どうも、ちょげ(@chogetarou)です。
ElevatedButtonのテキストの色を設定する方法を紹介します。
方法

ElevatedButtonのテキストの色を設定する方法は、2つあります。
style
1つは、ElevatedButtonの引数「style」を使う方法です。
まず、ElevatedButtonの引数「style」にElevatedButton.styleFrom()もしくはButtonStyleを指定します。
そして、ElevatedButton.styleFrom()もしくはButtonStyleでテキストの色を設定します。
styleFromバージョン
//styleFromバージョン
ElevatedButton(
  onPressed: () {},
  child: Text('Button'),
  style: ElevatedButton.styleFrom(
    onPrimary: textColor, //テキストの色
  ),
),
ButtonStyleバージョン
//ButtonStyleバージョン
child: ElevatedButton(
  onPressed: () {},
  child: Text('Button'),
  style: ButtonStyle(
    foregroundColor:
        MaterialStateProperty.resolveWith((states) => textColor),
  ),
),
使用例
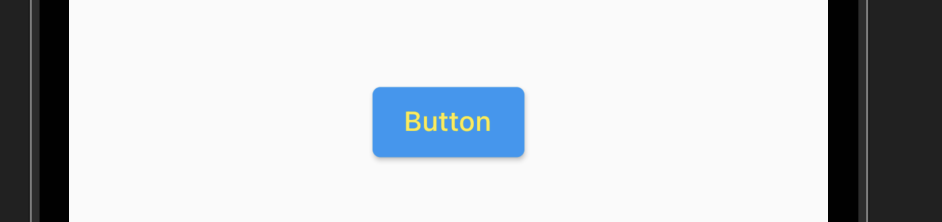
  @override
  Widget build(BuildContext context) {
    return SafeArea(
      child: Scaffold(
        body: Center(
          child: ElevatedButton(
            onPressed: () {},
            child: Text('Button'),
            style: ButtonStyle(
              foregroundColor:
                  MaterialStateProperty.resolveWith((states) => Colors.yellow),
            ),
          ),
        ),
      ),
    );
  }
Textのstyle
もう1つは、Textの引数「style」を使う方法です。
まず、Textの引数「style」にTextStyleを指定します。
そして、TextStyleの引数「color」にテキストカラーを指定します。
ElevatedButton(
  onPressed: () {},
  child: Text(
    'Button',
    style: TextStyle(
      color: textColor, //テキストの色
    ),
  ),
),
TextStyleの引数「fontSize」に指定した値が、テキストのサイズになります。
使用例

  @override
  Widget build(BuildContext context) {
    return SafeArea(
      child: Scaffold(
        body: Center(
          child: ElevatedButton(
            onPressed: () {},
            child: Text(
              'Button',
              style: TextStyle(
                color: Colors.red,
              ),
            ),
          ),
        ),
      ),
    );
  }
まとめ
ElevatedButtonのテキストの色を設定する方法は、次の2つです。
- ElevatedButtonの引数「style」を使う方法
- Textの引数「style」を使う方法